Build Your First NFT Minting Landing Page With Webstudio And Manifold
- Giancarlo Sanchez
- Apr 5, 2023
- 3 min read
Updated: Jul 5, 2023
Instead of minting an NFT using a marketplace’s smart contract solution, artists can create their own custom contracts and minting sites, for ultimate ownership and provenance.
For this we will use manifold.xyz for the smart contract and webstudio for the minting site in Ethereum Goerli Testnet.
Launching the NFT Smart Contract with Manifold
1. Visit https://studio.manifold.xyz/ and connect your wallet
2. Click on "New contract"

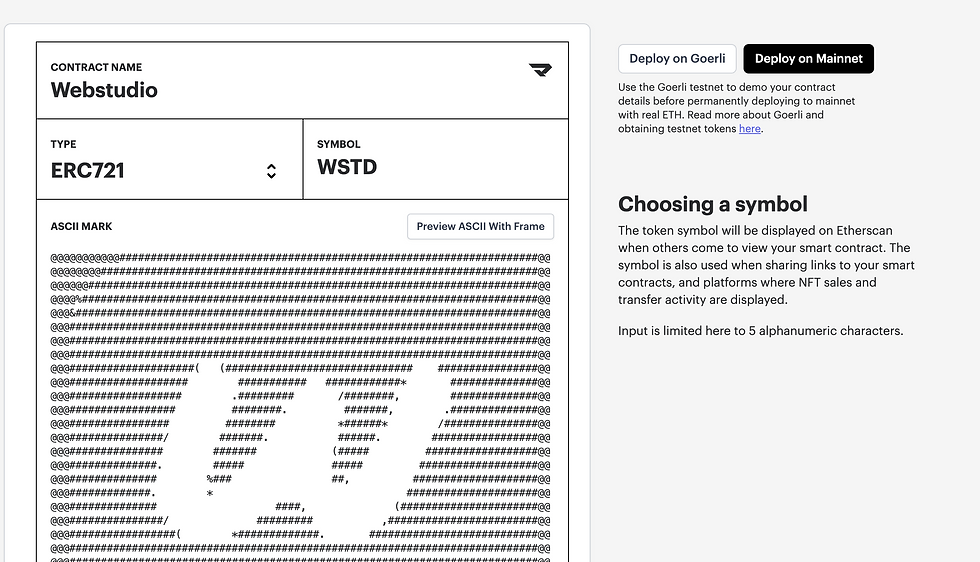
3. When prompted enter a contract name, a contract type (learn more, for this exercise we will use ERC721) and the symbol. In addition you will need to create an ASCII mark, you can use tools such as ManyTools to generate ASCII art from uploaded images.
4. Before we deploy our contract on the testnet we need GoerliETH to pay for the gas transaction. You can use the Quicknode Faucet to get test funds.
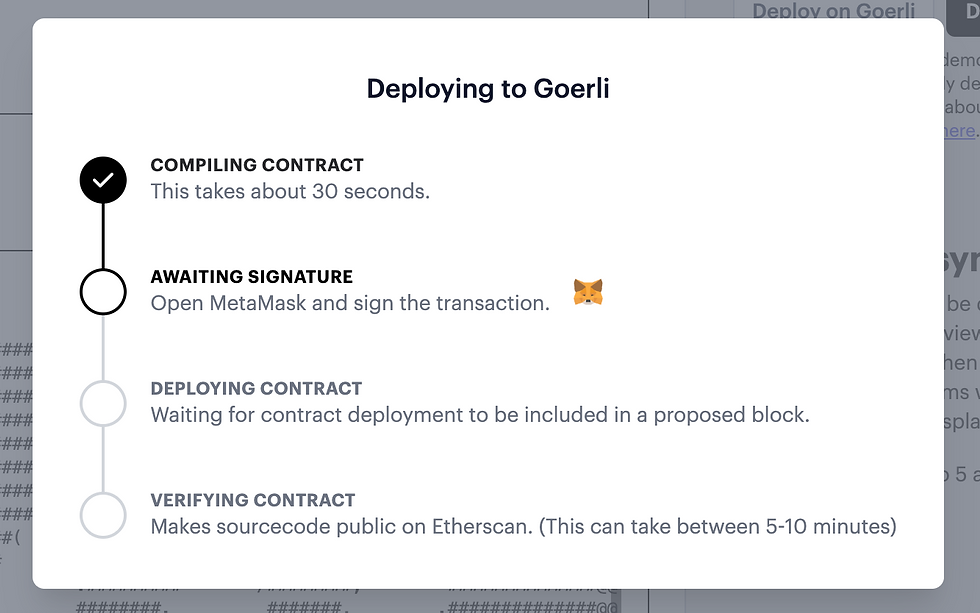
5. Let's launch it on testnet first. Click on Deploy on Goerli and follow up the wizard prompts that will guide you through the compilation, signature and deployment on the test environment.
6. Click on "View On Etherscan". Take note of the smart contract address as we will need it in the future.
Launching the Minting Website
7. Navigate to https://webstudio.so and create an account if you haven't yet!
8. Click on "Start Building" to navigate to the studio.
9. Once in the studio create a new project
10. Once you set the name and create the project you will be redirected to the drag and drop editor for the project.
11. Select a template of your choosing
12. On the blocks section on the right drag and drop the Wallet Connec & the Form blocks to the canvas
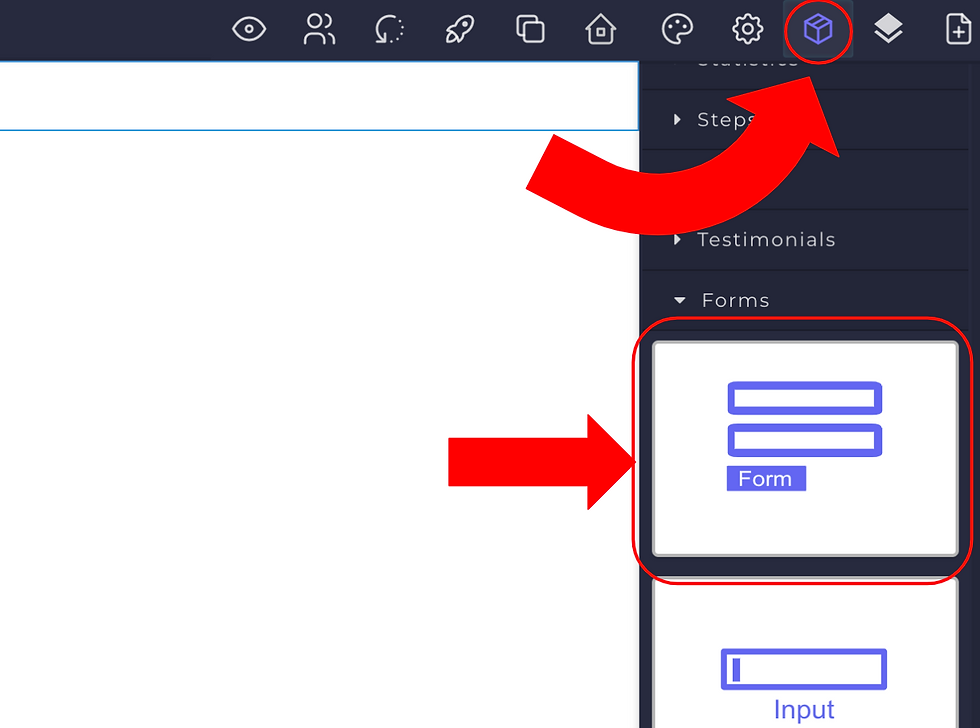
13. Once the Form is in the canvas click on the settings icon in the menu to configure it. Input the following values in the fields:
Contract: the contract address from Manifold (Step 6)
Abi: you can download the definition from Cookbook we only copy the method we will use for our form "mintBase" that receives 2 parameters, the address where the NFT will be minted and the URI of the metadata json file.
[{
  "inputs": [
    {
      "internalType": "address",
      "name": "to",
      "type": "address"
    },
    {
      "internalType": "string",
      "name": "uri",
      "type": "string"
    }
  ],
  "name": "mintBase",
  "outputs": [
    {
      "internalType": "uint256",
      "name": "",
      "type": "uint256"
    }
  ],
  "stateMutability": "nonpayable",
  "type": "function"
}]Method: mintBase
Explorer: https://goerli.etherscan.io/

14. Let's now configure the form inputs. Previously we noticed our method "mintBase" receives 2 parameters. The address "to" be minted to and the metadata "uri". Lets configure our first form input to use the connected wallet address so that when the user clicks on the button it gets minted to themselves.

Make sure all the attributes are set as displayed above.
For our second input, we wil click on it to select it and set the properties as follows to map it to the NFT metadata we want our users to mint.

We have prepared a metadata file you can reuse for this example by setting the "value" to it. This file already has an image, title and description set. You can use any metadata.json file url.
https://cloudflare-ipfs.com/ipfs/bafybeigcobfgmzcrutanx3trbbhumewoagsbzdrxzucjaah7jxte6krm7q/WebstudioNFT.json15. Let's drag in the Notifications block as well to receive event notifications
16. We can edit the style of our form as we want. Since we are using mapped values for our form we can hide them from view by adding the "hidden" class on the style manager while selecting them.

17. Lastly we can style our form button by adding the following classes (or manually editing style) while selecting it and opening the style manager. Our app should look something like this.
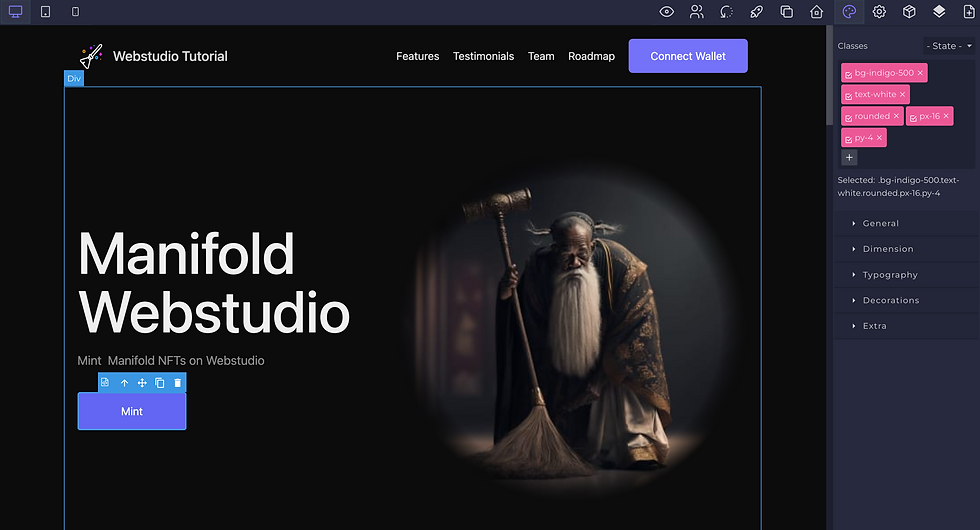
18. Launch your application and now authenticated users can start minting NFTs in Goerli Testnet. You should receive minting confirmation on screen and check your minted NFTs on Opensea
https://testnets.opensea.io/assets/goerli/{yourContractAddress}/{yourTokenID}

Comments